Saturday, July 31, 2010

Wood Chime in Action.


Now that my studio final is done, I can post some more about the project.

The Wood Chime.


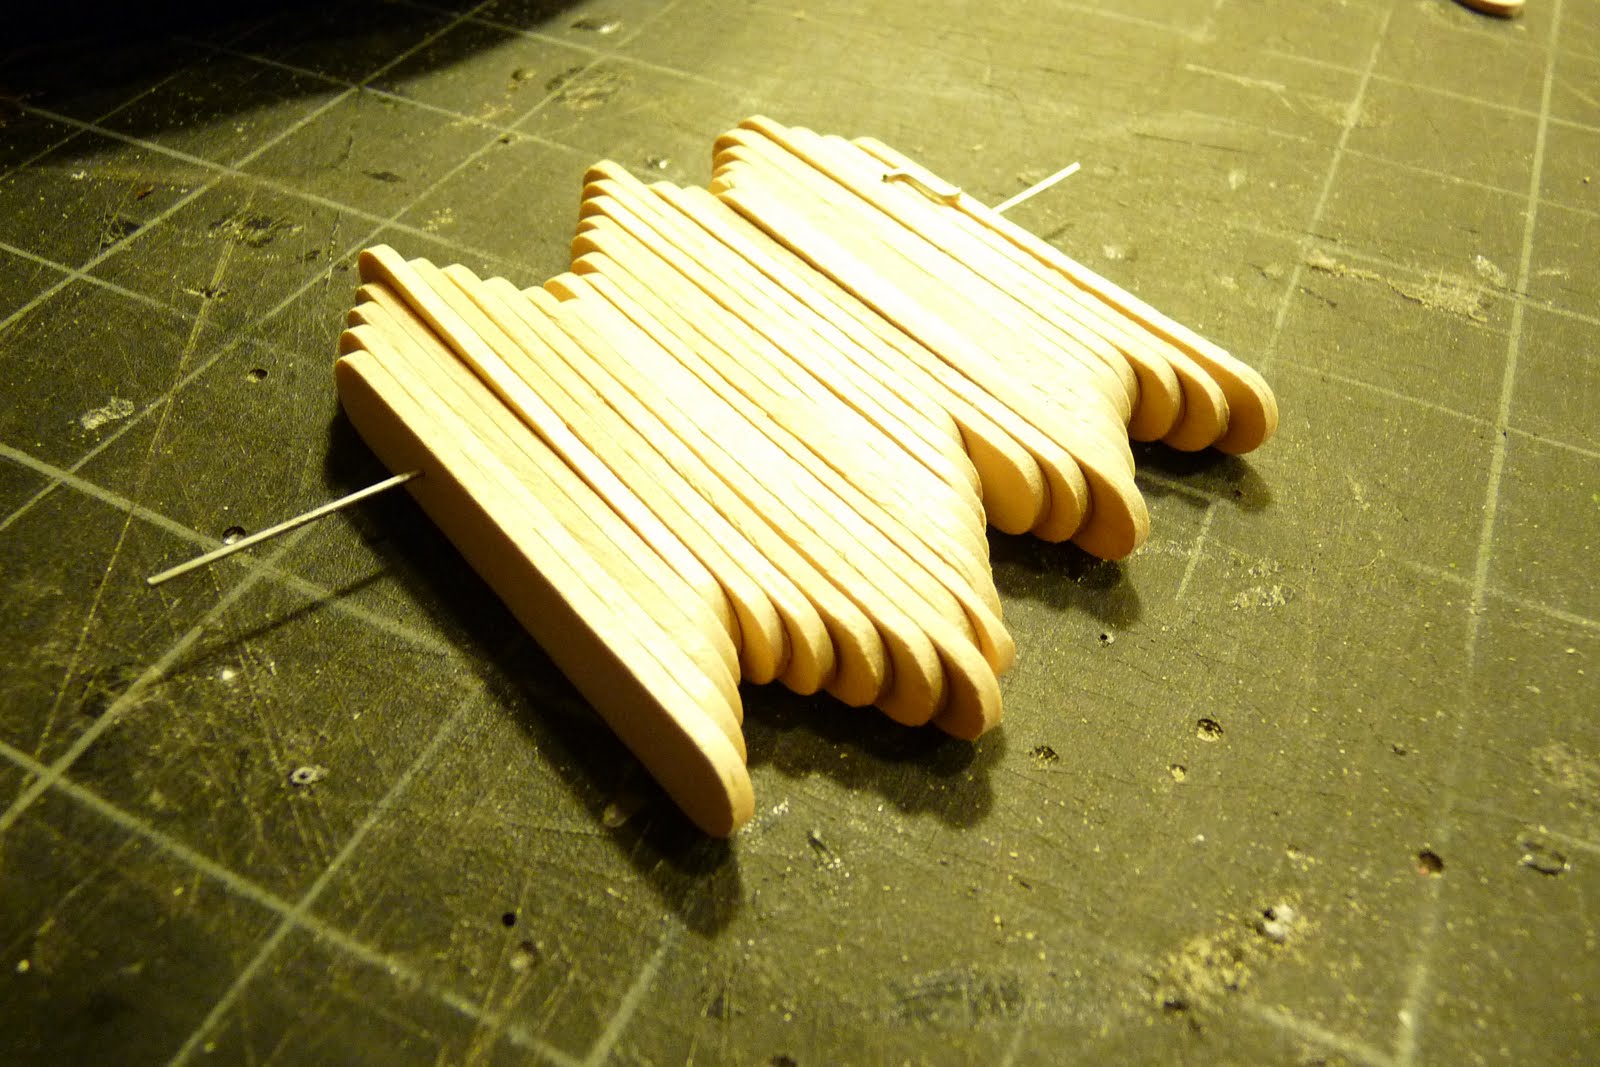
Get some Popsicle sticks from the Dollar store and drill holes so that is make a nice pattern.
Its best to make a template so the holes are even.

Then string them together like above. I tried different stick materials but steel seems to flex the least under stress.

the Popsicle sticks rotate freely around the pivot, but if their weight is too evenly distributed, they will balance out and not return to a verticle position. I didn't use the center holes in the template because of this.


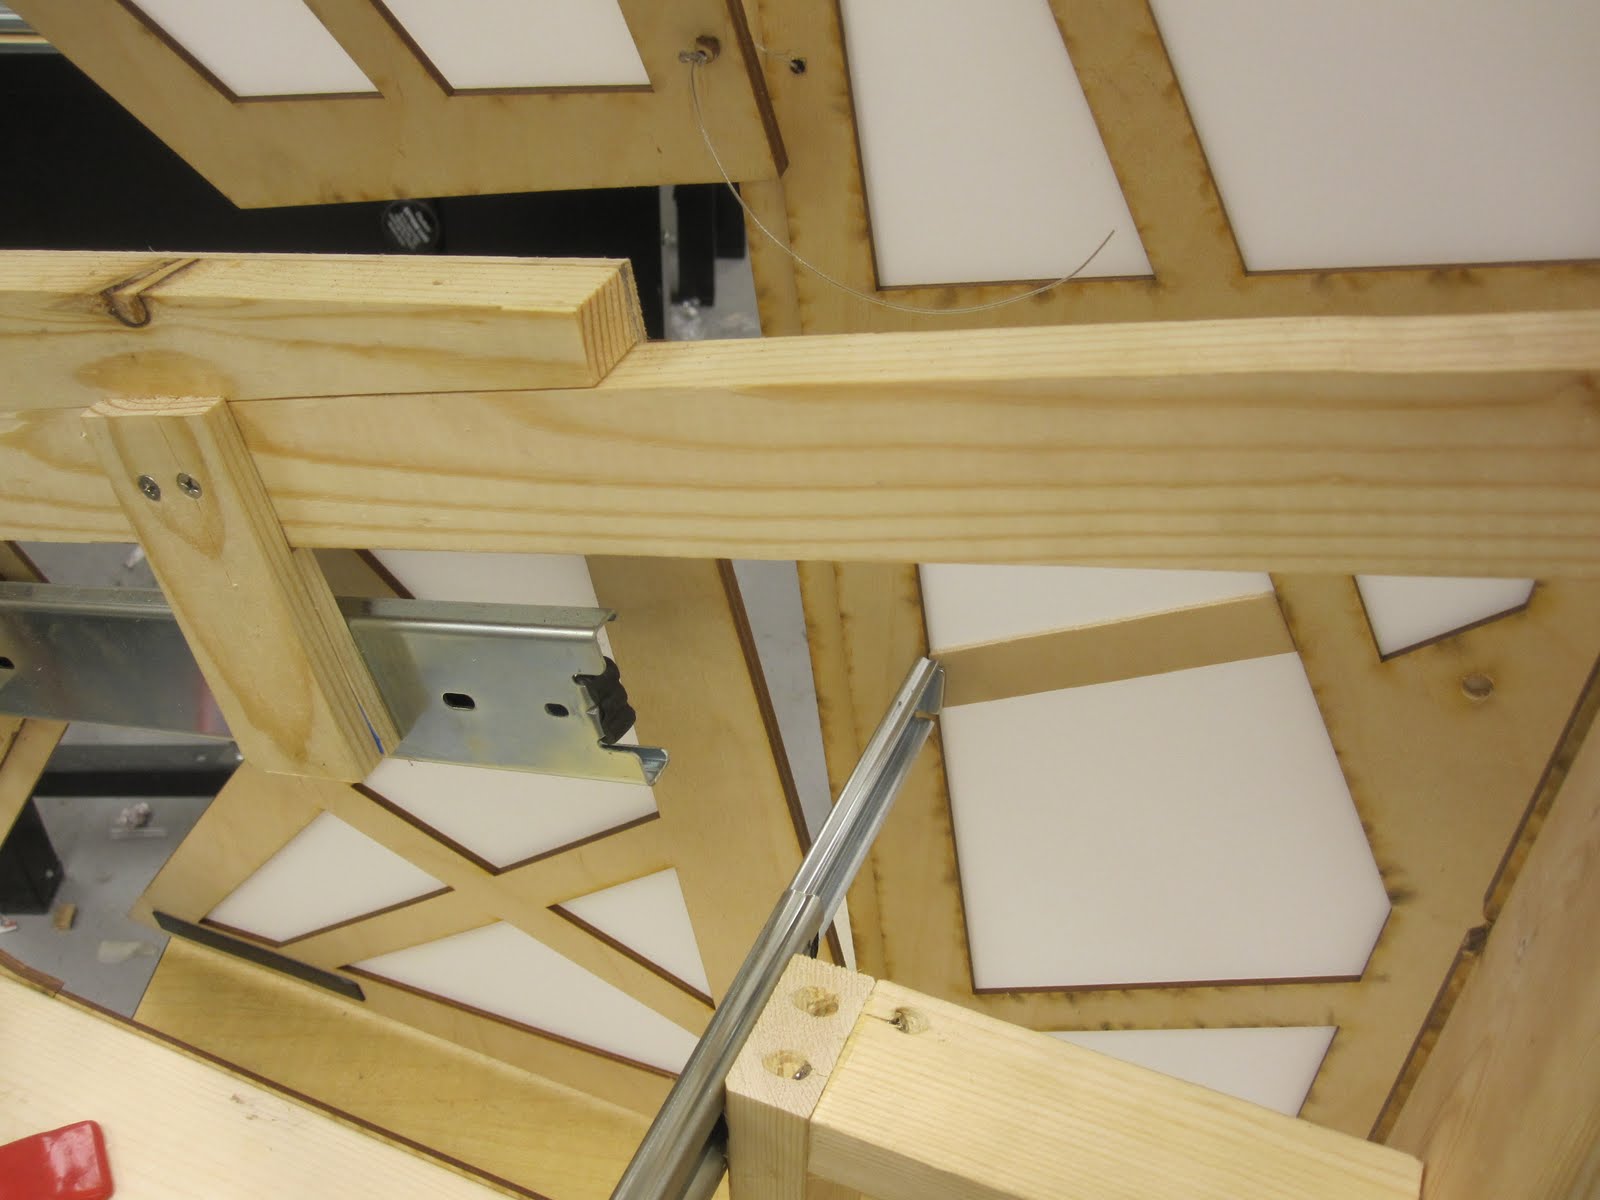
The turning part is made up of small wood tear- drop shapes with a hole drilled so they string together. The stick needed to be rigid and the wood pieces are not supposed to rotate around the pivot because the motor is turn the stick and therefore the entire shaft.


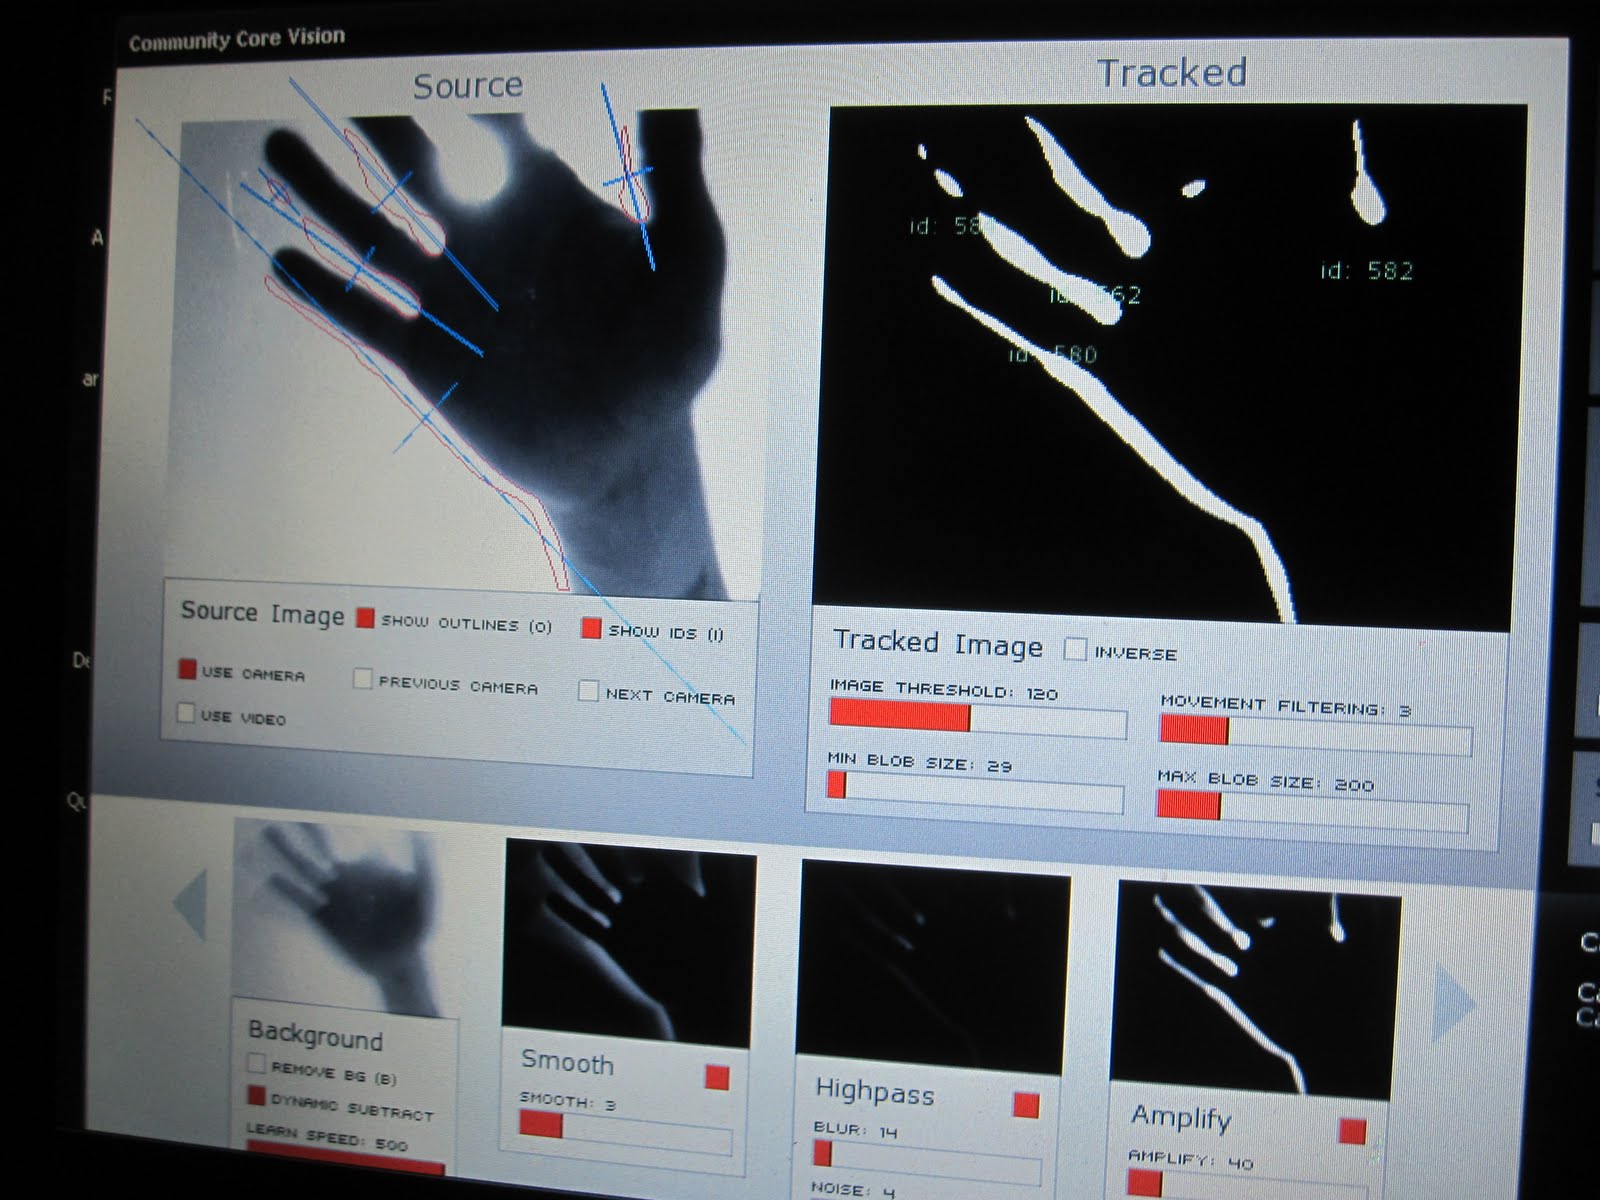
So I strung it all together and attached a CD motor to one end and hooked up the photo-sensor to the Arduino like so.


And the code was a simple sketch from the Arduino library, "Blink without Delay"


Just a few kinks to work out, I need to slow the motor down a bit, but all in all the overall project worked exactly as we planned.

And in Action.

Don't know if it embedded correctly so this is the link.
http://www.youtube.com/watch?v=734OoZNU1OE

Thursday, July 29, 2010

LED placement for successful illumination!!!

so i decided to come up with picture that would give the best description of how to light up a plexi piece to create a great effect.

Tuesday, July 27, 2010

Choose one...


so i chosen a door... and began to work on a design for it. i chose the reveal to have circular plexi cut out to make it oppose the outside suface so that it have the contrast behind the reveal.


after choose the door, began the designing of the reveal


Nicks Reveal

so....i made a reveal based on the previous assignment i did, just in a different contexts that made for this group project. in this project the reveal consist of 4 different doors and behind every door there would be a reveal. i chose to have a reveal of a LED light show. the lights would be constantly on and seen though an opague material.

Tuesday, July 20, 2010

......reveltekture......


Moving on to additions......CAN SOMEONE GIVE ME SOMETHING TO MOUNT!


The name in full......REVELTEKTURE

Finally coming together

Gears are working. Yeah!


We have 2 (12kg) servos rotating 180 degrees to open the doors. One servo operates the door going down at an angle. The other servo operates the door going out, with the remaining 2 doors attached with steel cable cut to the exact length of extension.


Now we are working on the code for the IR sensor that will open the doors upon viewer interaction. And by interaction I mean pausing to look at our intervention.
Our idea is to have the door begin their opening progression when someone pauses in front of them. To achieve this, we plan on rigging an IR sensor above the intervention pointing down at an angle so that it is not triggered until someone is directly in front.


We will keep on trucking, til we get where we want to be.

Monday, July 19, 2010

TOTAL MOVEMENT


Finding the center push point seems simple in theory. When you are pushing on something with odd geometries, gravity obviously, and multiple resistances in different areas finding a push point is difficult.


The door pushes and pulls others with a motor that is not yet attached... today this will happen...


Fully open.......................................................................................THE REVEAL IS LOOKING SWEET!!!


Only a few days to deadline...I COULD USE SOME HELP...SOMEONE!!!


Saturday, July 17, 2010

STRESS Test

So this has been not so easy, not that we thought it would go smoothly, but Dang! Working everyday, putting out fires and working out the kinks.
So many things to work on, so little time. Between this and Studio I don't think I am going to sleep much until August.
These photos are over a few days of working, I should have some from today but I forgot my camera because I remembered everything else I was supposed to bring, screws, drill, sensors, servos, mini table saw, ya know the important stuff.


So Today we finally got the door to slide smoothly, (Thanks Brennen) and got the servo mounted and level, but it was just too weak to slide back up after its descent.


No biggie. Just replace the servo, or borrow one from a totally awesome and generous team (Thanks Matt and Carlos) we owe you...about 15 bucks and a beer or 2.


So One door works great and the rest are coming along nicely.


P.S. If any group members would like to join us we will be working on the project everyday until it is due, on Thursday... this week. I know people have other things to do, I have a Studio Final I could, no, should be working on. Group projects suck, but only when 2 people do all the work and everyone else seems to pass. So if you read this, COME TO STUDIO AND DO YOUR PART, please.


We still have so much to do.

Servo Served Us


After days of mounting and remounting (new door slider...super smooth) we finally completed door one...

THEN THE SERVO DID NOT HAVE THE POWER TO DO THE JOB!!!

We are attempting to try and mount a new servo to test to see if it has the might. HOPEFULLY THE THIRD TYPE OF SERVO WILL WORK!!!

Back to the beginning as it has been day in and day out. The question now is will the setbacks overcome the progress.

Thursday, July 15, 2010

Progress...ONE WEEK REMAINING


We meet again...


So far we have worked out the outer skeleton aesthetically and are on the verge of making it functional.

The doors are slowly mounting, sliding, lifting, and becoming more and more difficult to engineer.


This is what happens when you design as you go... (FIXED PERFECTION)


CODE... GEARS... MOTORS......aaaaaaahhhhhhhhhhhhh

In other words we are all having a blasty blast!!!


Saturday, July 10, 2010

Trials & Tribulations of the Laser Dependent Student


So we have all of the door pieces figured out, and the laser cutter no worky worky.


Between Brennen and myself we designed of the gears and arms for the doors to open properly and in sequence, but can't cut them. Now we might be in trouble.

Tuesday, July 6, 2010

We meet again...


We met...we conquered!!!

The idea is having multiple revealing planes moving in odd ways creating a rube goldberg (slightly Scarpa) chaos. Aaaaahhhhhhhhh

"the Reveal"

Totally unrelated....Floppy Disk Purse


Ok so this is not related to class, but it is an adaptive reuse of technology, and its crazy cute.


I was cleaning this weekend and found these old floppy disks, so I made a purse.


This was the stuff I used. The holes are already there if you lock the disk and drill through the preformed round holes. I found that if you connect the holes you can create a flat material.


I did a couple of different connections
Zip ties worked good as a connection, but didn't look good. The final solution was Black book binding tape on the inside. It is very sturdy and makes it easy to make an even exterior.

New Ideas for Smart Skin


Cheap stuff looking cool.
Popsicle sticks with a pivot point and tied together. When a motor turns behind the vertical plane the sticks move in a fluid wave.

Old ideas not yet Blogged


So these were some of the ideas for the wall I didn't have time to post. This one is the "Muscle wire Arm" An arm constructed of wood or pexi with flexible joints and a muscle wire core, holds a pen or piece of lead. When one walks up to the wall the arm begins to draw your "elephant portrait"


This idea was a cute one. Again with the muscle wire. Fish and sea creatures made of muscle wire skeletons seem lifeless until someone walks up to the "tank" Then they come to life and follow the viewer as they move around the face of the "tank/ skin"

Thursday, July 1, 2010

80's Colors - Modern Mayhem


Geometries revealing mechanisms within...


Motors actuated by infrared is the start...

NOW LETS HAVE FUN...


What on earth could this skin be...


It must be...

Cheap
Awesome


After these are designed... ALL THE GADGETS WILL BE IMPLEMENTED

LED show... Crazy geneva gear fun...spinning LED's...etc.


Design...design...


Herding Cats

Well, after a week of talking about what we are going to do for our smart wall, we finally came to a consensus. Brennen designed our outer shell. It involves folded planes hinged at irregular corners, opening to reveal pockets of activity or interaction. The idea is to expose interior skins at various scales doing crazy awesome stuff. More to come after my jury (unrelated) tomorrow.

Wednesday, June 30, 2010

The Skin Bares...

Made up of "Tectonic Plates" that interconnect... The skin itself reveals and the Earth bares the components (metal). The material chosen has translucency so when closed it still interacts as one walks by.

Odd geometries create the plates that when open (via specific sensors per plate), reveal the unknown!


Looking past all the B.S......

If we build it they will come...NO QUESTIONS ASKED!!!


Tuesday, June 29, 2010

Core Vision Exploration...Netbook Style

Well...within one hours of hearing about this core vision software its uploaded and running. Although I did not use an infrared camera I successfully used my webcam and tweaked the settings to get similar results. Currently I am working on how to export this interactivity of movement to LED's versus a screen...

Needed -
Netbook(Computer)...webcam...Partial brain functions...B.A. dining table (for the moment)


If the arduino can interact I will work on a skin development in which this technology will be present within its shell...

Tuesday, June 22, 2010

SYSTEMS


The idea is to simplify the 2' x 2' area into layered systems. By layering systems group members can individually work on code and their own intervention...then they can be combined into a holistic idea.


(4) POSSIBLE SYSTEMS for group members...

1 - Arduino, Motors, Fabric, Muscle wire, some sensor

2 - Arduino, LED Light Show with proximity sensor

3 - Arduino, Interactive play piece..

4 - Arduino, MORE TO COME!!!

ALL SYSTEMS CAN DOUBLE OR TRIPLE WITH FUNCTIONS...
CREATING MULTIPLE INTERACTIVE OPTIONS!!!

SURFACE


THE MOVABLE SURFACE MUST BE TRANSPARENT OR TRANSLUCENT!!!


A possibility of a wire mesh or fabric is possible...

Another possibility to really play with light and incorporate noise could be vinyl plastic...

Both surface options can be layered and colored to create the effects we are going for.


HOW TO MOVE IT?